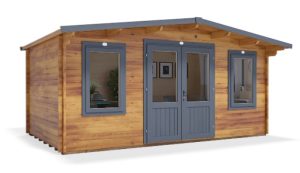
The Benefits of Adding Paint Treatment:
1. Protection Against Rot:
The paint/ wood preservative treatment will help protect the wood against the weather to help prevent rot.
2. A Really Easy Process:
Applying the treatment is super easy, and if you want to change it up after some time there are no restrictions!
3. A Personal Touch to the Garden:
By choosing a colour or theme that resonates with you, the log cabin can become more personal.
4. Make Your Log Cabin Stand Out:
With an endless number of colours to choose from, you can really make your log cabin stand out amongst your outdoor space.

How-to Guide to Paint the Trims of Your Window:
Step 1:
If there is already paint on the trims, you will need to sand this down and take away the top coat.
Step 2:
Mask off any areas that you do not wish to be painted. Particularly with the woodwork of the main cabin, you can also cover the glass on the window to save the hassle of scraping it off at the end.
Step 3:
If the timber is not treated with a preservative, then a wood preserver may need to be applied. This is dependent on its use and the timber itself. All of Dunster House’s log cabins are treated as standard.
Step 4:
Open up your chosen paint, give it a good mix and away you go. Be sure to have good-quality paintbrushes. We recommend at least 2 coats, and a 3rd if you are painting a light colour.
Step 5:
Once dry peel off the masking tape and tidy up any small areas. A scraper is perfect for removing paint from a glass service. Then sit back and enjoy your hard work.


