

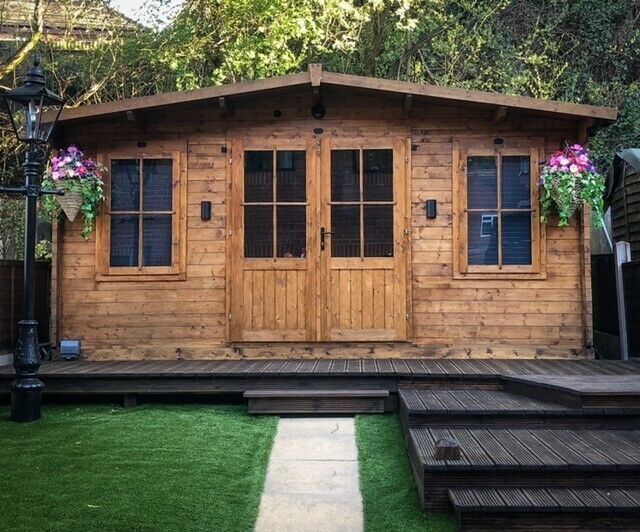
Garden Log Cabin Care and Maintenance Guide
Why should I care about Log Home Maintenance?
In order for log cabins to have a prolonged life it is vitally important that you take the correct measures to maintain them properly.
So what preparations do you need to focus on, to execute adequate log cabin maintenance?
Key Areas Checklist:
- Make sure that you treat your cabin as soon as it is built
- Make sure that you choose the correct treatment
- Make sure that you re-apply treatment when required
- Make sure to look out for possible rain damage and leaks
- Make sure you take measures to control moisture in and around your log cabin
- Make sure that your log cabin can settle properly
- Make sure that your log cabin is secure
For more details on how and why you need to undertake regular log cabin maintenance, read on.
Treatment
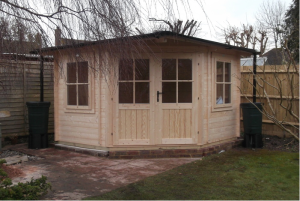
Dunster House’s log cabins are supplied untreated for you to decorate and finish in accordance with your taste and style. We strongly advise that you treat your log cabin as soon as you construct it. Then continue to treat it regularly to strengthen it against varying weather conditions. If left untreated, your log cabin will deteriorate.
Before you start, use masking tape to protect hinges and glass. If you wish to you can protect the ground around your log cabin with ground sheets. If you want to protect your cabin really well then you can remove the windows and doors by unscrewing the internal trims and treating the walls without the windows and doors in place. Alternatively, you can simply paint over both at the same time.
When applying the treatment, it’s common practice to start at the top of each wall and do one wall at a time. Wait for each wall to dry before coating them a second time. When the treatment is dry, remove the masking tape and sheets.
If you’re treating your log cabin during winter, make sure that the building is completely dry before you begin. Check the weather forecast and time this part of the maintenance so that it is undertaken with dry weather.
Choosing the Correct Treatment:
There are a number of different types of stain-based treatments that you can choose for your log cabin. Below is a list detailing the properties of each, to help you make your choice.
Water-Based Treatments:
Water-based treatments are water resistant and can be applied directly onto wood, no need for a primer. All timber to be treated must be sound, free from dirt, dust, wax, grease, organic growths and surface moisture. Areas to be treated should be dry and previous coatings or repellents should be removed or weathered sufficiently to allow treatment to penetrate/bond to the surface. For best results, sand lightly in the direction of the grain and dust off. Allow to dry between coatings.
Solvent and Spirit-Based Treatments:
Solvent and spirit-based treatments are a step up from water-based ones. They provide more protection than water-based solutions and are also easy to apply. They are long-lasting and are deep penetrating preservers which protect against wet and dry rot. Prior to application, the wood stain should be stirred gently, with a wooden stick. Apply by brush ensuring a good even coating of the timber surface. Ensure any end grains are liberally coated to create a good seal. When using this solution, your log cabin should be re-treated every three or four years subsequently, depending on weather conditions.
Oil-Based Treatments:
Oil-based treatments are even better, soaking into the timber to provide thorough protection, yet leaving a certain amount of ‘give’ so your log cabin can still expand, contract, and settle naturally. With long-lasting UV protection, strong water repellent and powerful fungicides these wood preservatives will keep your garden building looking good for longer. Oil-based stains are also more durable and only need to be touched up every 4-5 years. However, any sides of the log cabin that are particularly vulnerable to weather should be re-treated more frequently.
Pressure-treating is a process which forces wood preservatives deep into the pre-cut timber giving it a more thorough application than through painting or spraying. Pressure-treating also allows for protection against fungal and insect attacks. We pressure-treat the floor bearers, the lowest part of the cabin, that is most in contact with dampness.
.jpg)
Making sure that you Re-Apply Treatment when Required
If you need to check whether it’s time to re-apply your log cabin treatment, spray a bit of water onto your log cabin exterior and see what happens. If the water beads up and rolls down the surface without seeping into the wood, you’re all right for another year; if the water soaks into the wood, you’ll need to apply a fresh coat. Be sure to check the corners and ends of the logs as well; even if most of the surface is still resistant, the sides might be absorbing more moisture.
In some cases, you will need to clean your log cabin before re-applying treatment. You can do this by hand, using a lightly damp cloth. If the cabin is very dirty you may need to sand the area before applying a fresh coat of stain.
Looking Out for Rain Damage and Leaks
During the cleaning process, it is useful to note where the dirt splatters and rain spots have built up on the walls and may be causing damage. Here you should be taking extra measures to protect your cabin against these elements in those areas.
This can be vital for locating certain areas of your log cabin that you may need to waterproof with a silicone sealant (available from DIY stores), although you should only use this after re-applying treatment to your cabin. Common problem areas include the joints around the windows and doors, the interlocking corners from under the roof to the foundations, and any visible gaps on the log ends.
Controlling Moisture in and Around your Log Cabin
Creating an environment that aids moisture control is one of the most important aspects of log cabin maintenance. This can be broken down into four key areas: the roof, foundations, surrounding drainage and keeping the cabin warm.
Log Cabin Roof
Your log cabin is going to get wet when it rains. Positioning it so that wet trees will not drip onto the roof can make all the difference. Regardless of the position, it is vital that the roof of your cabin has wide eaves to prevent rain or snow from coming into unrestricted contact with the exterior cabin walls. If you choose to add shingles to the roof of your log cabin they normally include a waterproof durable thick plastic membrane, providing extra protection. During periods of heavy snowfall, you should brush off any snow that accumulates on the roof. You should also make sure to clear any snow from the surrounding area.
Log Cabin Foundations
It is important that you don’t set your log cabin directly on the ground, as doing so will make it easier for water to seep in through the flooring.
If you opt for a concrete base it should be larger than the cabin itself by approximately 100mm, and ideally set at 100mm thick, or 150mm if the ground is more uneven. It is also important to ensure that the foundations are well insulated and that the earth around the log cabin isn’t too close to the base.
In addition, you should make sure that the joints between the floor and the walls are secure so that no water can seep through.
Remember that there are also more environmentally friendly Foundation Systems to help avoid the mess of concrete and the time it takes to mix, lay and set.
Our Premium RapidGrids include weed control membrane with strong plastic grids which we recommend you fill with pea shingles. For further information about our foundation systems please click here.
Log Cabin Drainage
Ideally, to aid drainage, your log cabin should be placed at the highest point of your garden, or at least with the base elevated two inches from the foundation and the surrounding grass or dirt to reduce rain splashing back onto the logs. Use a gutter to direct the water well away from your log cabin, ensuring that it’s kept clean so the flow of water isn’t disrupted.
Keeping your Cabin Warm
Keeping your log cabin warm in the winter can be tricky. Even if yours has thick walls, a thinner roof and floor can result in lots of heat being lost. Insulating your roof and floor is the best solution for heat retention; as is opting for an underfloor heating system. Opening the windows on dry days or when they are steamed up can also help prevent dampness caused by condensation.
Settlement
Timber is a natural product that will contract and expand according to the weather. You need to ensure that the wood has enough space to do so without warping.
Once the log cabin is constructed, there will be a period of ‘settling’ as the wood reacts and adjusts to the climate. The wood will shrink and settle which can lead to splits and cracks forming in the wood over time. This shouldn’t, however, compromise the structure of your building. You can fill in such splits with a matching flexible sealant.
Most log cabins come with storm braces – wooden battens fixed to the cabin with coach bolts. It may be necessary to release the tension from the top coach bolt to allow the storm brace to move freely. This should be checked regularly throughout the life of your cabin to prevent gaps between the logs.
Security
Good quality log cabins come with double-glazed windows made from toughened glass, and doors equipped with secure locks.
At Dunster House, we’re committed to making sure you get the best so if you have any questions, we’re happy to help! Contact us if you need any help or further information, or why not visit our Learn More section to find out all you should about a Dunster House log cabin.


 Back to help centre