

One of the most common questions we get asked about is how to maintain your Log Cabin’s beauty. Here we provide some Log Cabin treatment (beauty) tips on how to choose the right treatment to bring out the best in your garden room for years to come. Treatment is also a good way to add colour, and finish off your garden building to your own individual style and tastes.
For ease and convenience, we suggest treating your log cabin after construction, allowing you to fit everything together and rectify any errors. It is very important to treat timber with a preservative. Timber will contract and expand in different weather conditions. Therefore, if left untreated it will deteriorate. You will also need to periodically reapply treatment to your log cabin in order to maintain and prolong its beauty and life.
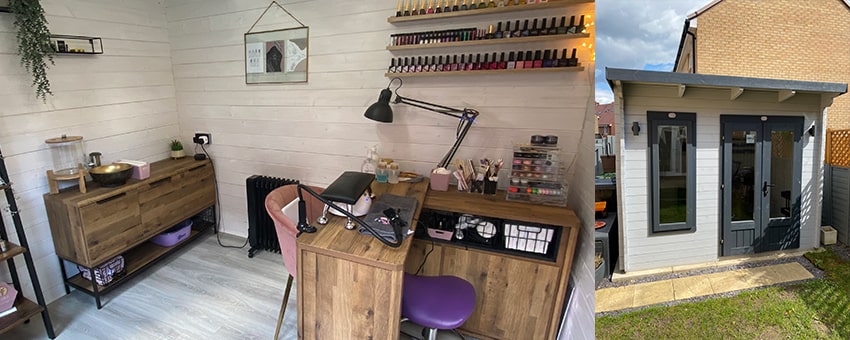
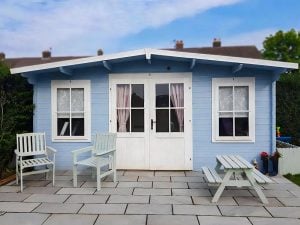
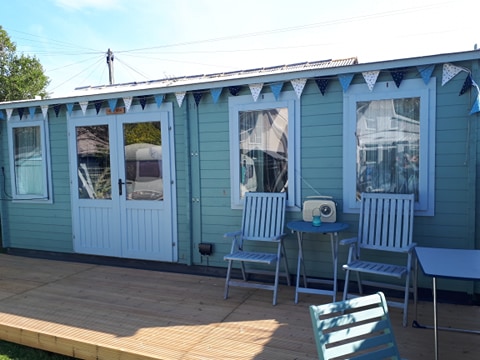
You can purchase a treatment when choosing your log cabin, or can buy it at a later date, from our extras page. We offer a wide variety of treatments to suit different budgets and design vision. There are two options when choosing a treatment colour for your log cabin. You can either enhance the natural beauty of the gain with a wood stain or clear solvent-based treatment. Or if you want to add life and character, you can go for a vibrant colour and make it the focal point of your garden.
Does a Log Cabin need treating?
Dunster House Log Cabins come untreated, giving you complete flexibility when it comes to decorating. You may question “does the log cabin need to be treated”? The simple answer to that is, “yes”! Coordinate the colours and style to suit your garden and preference. The whole structure/framework of the log cabin comes untreated, apart from the floor bearers which are fully pressure treated. As the floor bearers are the foundation to the log cabin, they have been pressure treated to increase longevity and durability. Any pressure treated goods come with a 10 year guarantee against rot and insect infestation.
By applying treatment, you are protecting your Log Cabin from the effects of damp, decay and fungal growth. Many contain transparent iron oxide treatments. These absorb UV rays to prevent the natural fading that can happen if untreated timber is out in the sun. If you choose one of our high quality untreated products, then it will require the addition of a wood finish. This is so you can customise your Log Cabin to look any way you would like. We strongly recommend treating your Log Cabin as it can extend its life and help protect it in the varied weather conditions thrown at it.
If you have picked one of our pressure treated products, such as our Garden Offices, then you will not need any timber treatment. The process of pressure treatment forces the treatment deep into the natural wood of your cabin walls. It is a much deeper treatment than if you were to spray it or dip treat it. This protects your Garden Building from any rot or insect infestation with no further wood preservative needed. We add a deep brown treatment during the pressure treating process, as we think it enhances the beauty of the wood and makes it stand out in your garden for all the right reasons. All we ask is that you annually coat the wood with a clear water-repellent as soon as possible after constructing. This will help prolong the life of your timber garden building.
Treatment colours:
We sell Log Cabin Treatment in a variety of colours, allowing you to not only protect the wood, but have a Log Cabin that you simply can’t stop looking at. We’ve taken the hard work out of choosing and provide you with enough for two coats. The only thing you have to think about is applying it according to the manufacturer’s instructions. Talk to our sales team about the colours available for your particular cabin model. Or view the specific product pages on our website for full details and prices.
All of these treatments are top quality wood stains, from Protek. The Premium treatment is solvent based, and can be applied without the need for a primer. The PremiumPlus Treatment will need reapplying every five years. Meanwhile, the PremiumPlus is water based, and low in odour. It provides a water resistant coating with long lasting mould and fungal protection. Our treatments are easy to apply, so it will not take your whole weekend to treat your Garden Building. You will just need a few hours, leaving you more time to enjoy your new garden room.
To view our full range of treatments available, take a look at the Optional Extras page on our website. Alternatively, you can give our sales team a call on 01234 272 445.
Preparing to apply treatment
If you are retreating your Garden Building, rather than treating for the first time, then the majority of the same rules apply. To ensure that your Log Cabin is ready for retreatment, simply spray it with water. If the water beads on the top and then rolls down the cabin, then it does not need retreating as the previous treatment is still protecting it.
If the water soaks into the Log Cabin timber then it is time to retreat the timber to protect it against the elements. Be sure to check corners and the end of the logs too, they can start absorbing moisture before the main logs of the cabin.
Lay dust sheets down around the exterior of the Log Cabin or Summerhouse if you have a patio or concrete to protect. Similar to how you would protect your carpets if you were painting the front room. Next you will need to think about protecting your doors and windows. Cover hinges, and the glass, using masking tape.
Alternatively, you could simply remove the windows entirely. If you do remove them, make sure you keep them somewhere safe to avoid damage.
Once you have protected all the areas you can’t get treatment on, it is time to prepare your spruce. This is not a difficult process and should not take you too long. Make sure your Log Cabin is clean, dry and free from any sharp edges. If you do find any, a quick rubbing over with some sand paper will smooth these.
Make sure your Log Cabin is clean before you start treating it. If the dirt build up is not too heavy, you can do this by hand with a damp cloth. If you think the dirt needs something stronger, a quick blast with a pressure washer should help get the dirt from the grain. Ensure you give your Log Cabin time to dry before applying a new coat of treatment.
Another benefit of the cleaning process is that it can show up any areas that may be suffering from damage due to heavy rain, or any leaks in the roof boards and around your cabin. Keep a lookout for these. In most cases, a waterproof silicone sealant can be added after you’ve finished treating your cabin to prevent this.
Applying treatment
Once you have finished building the log cabin, the next stage in the process is treating the timber with a suitable coating. This will need reapplying periodically, or regularly inspecting, to maintain the log cabin beauty and prolong its life. We recommend to follow the ‘Directions For Use’ and aftercare by the manufacturer of your treatment choice.
The application of treatment couldn’t be easier. Grab a new, clean paintbrush. You don’t want to risk any dust or loose hairs getting into the tin in the treatment process. Take care to apply the coats evenly to your garden buildings, starting from the top and working your way down. This helps to avoid overstretching and catching it on your clothes. This would not only create extra washing for you, but also could result in an uneven finish.
Settlement of the timber logs
All the logs of the cabin will generally settle within the first few months. Timber naturally changes season to season, so the moisture content within the logs will cause expansion and contraction. This is a natural occurrence. To a certain extent, it is unavoidable, but it can be limited by applying a good timber treatment to the exterior. In addition, we strongly advise against fixing anything directly on to the logs that may restrict the natural movement of them. Install freestanding storage units, cupboards and other interior bits instead.
Adjustable storm braces
Our Log Cabins come with storm braces (wooden battens fixed to the cabin with coach bolts). No matter what log cabin you choose to purchase at Dunster House, we include the adjustable storm braces at no extra cost. This fixing holds and tightens any gaps that appear between the logs. It may be necessary to release the tension from the top coach bolt to allow the storm brace to move freely. These can be fitted to either the inside or outside of the log cabin, it is entirely your choice. You should also check these regularly throughout the life of your cabin, to help prevent gaps between the logs.
Additional weathering
With the log cabin sitting outside all year round you will need to take care to protect it as best you can from the elements. There are things that you can do to increase weatherproofing, in addition to what is already in place. After the log cabin has been erected and coated with treatment the following can be sealed:
- Joints around the perimeter of the windows and doors
- Any corners that interlock from under the roof to the foundations
- Visible gaps on the log ends
Silicone sealants are available for purchase from a variety of DIY or home improvement stores. This will need checking and reapplying. However, it is difficult to say how often, as this will depend on how well your log cabin has been maintained. Please check and apply during the life of your log building as necessary.
Read the full log cabin maintenance guide.

 Back to help centre