Big or small, treated or untreated, open or sheltered, high quality or… well we only do high quality. As you can probably tell just from that preliminary list we like to offer you a wide variety of choices. So, whether you need a garden office to give you some peace; a shed to organise your belongings and provide extra storage; or a log cabin to give you an area to entertain you can find your ideal DIY garden building with Dunster House.
If you need some extra insight into choosing the right garden building for you we have you covered from blogs and help centre articles on planning permission to our range of how to guides. So check them out now!
Pre-build
Base
Once you have picked your garden building map out your foundations. Make sure that regardless of what foundation you choose – concrete, rapidgrids, decking, etc. – it is flat and level. If you decide on concrete (which is a prevalent choice)you should level an extra 100m on top of the size of your building dimensions.
Instructions
Before you build your garden room we would recommend reading your instruction manual in detail. This can be found in the customer log in area. You should also compile your tools.
Inventory
To make your build as straightforward as possible, take an inventory of the components of your garden building.
We understand the urge to jump right into the construction but first, we recommend you do an inventory, we know that isn’t the most thrilling step but it is important. You don’t want to be mid-build and only just realise you’re down a log.
During this inventory process, we’d suggest separating all the parts into piles and bringing a trust packet of Post-it notes for labelling. Also, while you are doing your inventory take the opportunity to find and correct any natural faults in your timber.
The DIY Build
Floor
We’ve got to the beginning of the build (yay!). Now let’s get that floor constructed.
Your foundation should act as a rough guide, but we recommend you use your trusty tape measure to ensure everything is in line.
Then, pre-drill your screw holes so everything is aligned properly and it also makes the process of drilling in the screws easier. As you screw and drill make sure nothing has shifted from the original placement as your floor must be square and level. An uneven floor could affect the rest of your build.
Walls
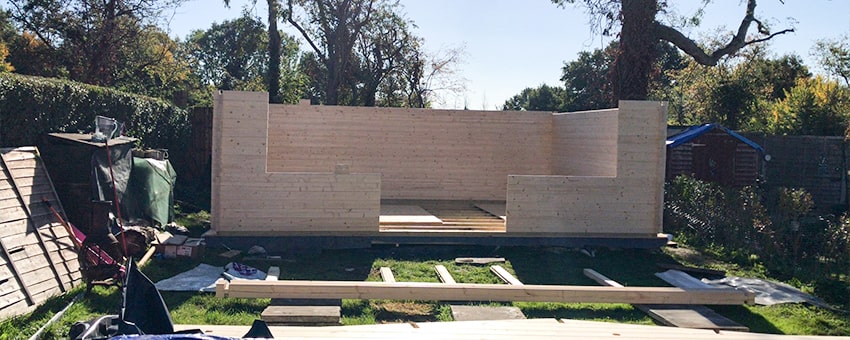
Now it’s time to put your walls up – no not emotionally you’ll need to cooperate with your team for this.
DIY Log builds
If you haven’t managed to correct the fault of the timber put them at the bottom of the build so that the weight can help correct them. Work together when lifting heavy materials and when you reach a complex section.
As you go keep checking your garden building is square and level. This may seem like overkill but it’s better than stepping back to admire your handiwork only to realise your garden building like it has been down the pub and had one too many.
Instead, we think it would be better if you transform your garden room into a pub shed. As you reach the top of the building you will need to use ladders to get the logs up easily and safely.
DIY Panel Systems
Form the corners first, on a panel system build, as this will provide stability to the structure. Before you screw your wall panels in make sure to measure the distances and placements. You could even do a ‘mock’ build to see how it would look before adding the screws.
Roof
Before you can raise the roof you’re going to need to build it first. For some of our garden buildings, you will need to use nails, which – speaking from experience – are incredibly difficult to remove when completely nailed in. So take this opportunity to step back and see the bigger picture. It may even help to ask someone not involved in the build to check your work.
Extras
Then all that’s left is to add the finishing touches – vents, handles, Dunster House plaques. For these, it is simply a matter of lining them up correctly and screwing them in. It’s as easy as pie to add the cherry on top!
Our DIY Top Tips
- Check your work (multiple times)
- Take your time to consider the details (and don’t hesitate to make notes)
- Measure everything out (it may take time now but will save you problems in the future)
- Check out our other blogs and help centre articles (on maintenance, paint selection, timber care, etc.)


